




Showing posts with label Tutorials. Show all posts

Tuesday, June 6, 2017

Diamond Eyelet Baby Blanket


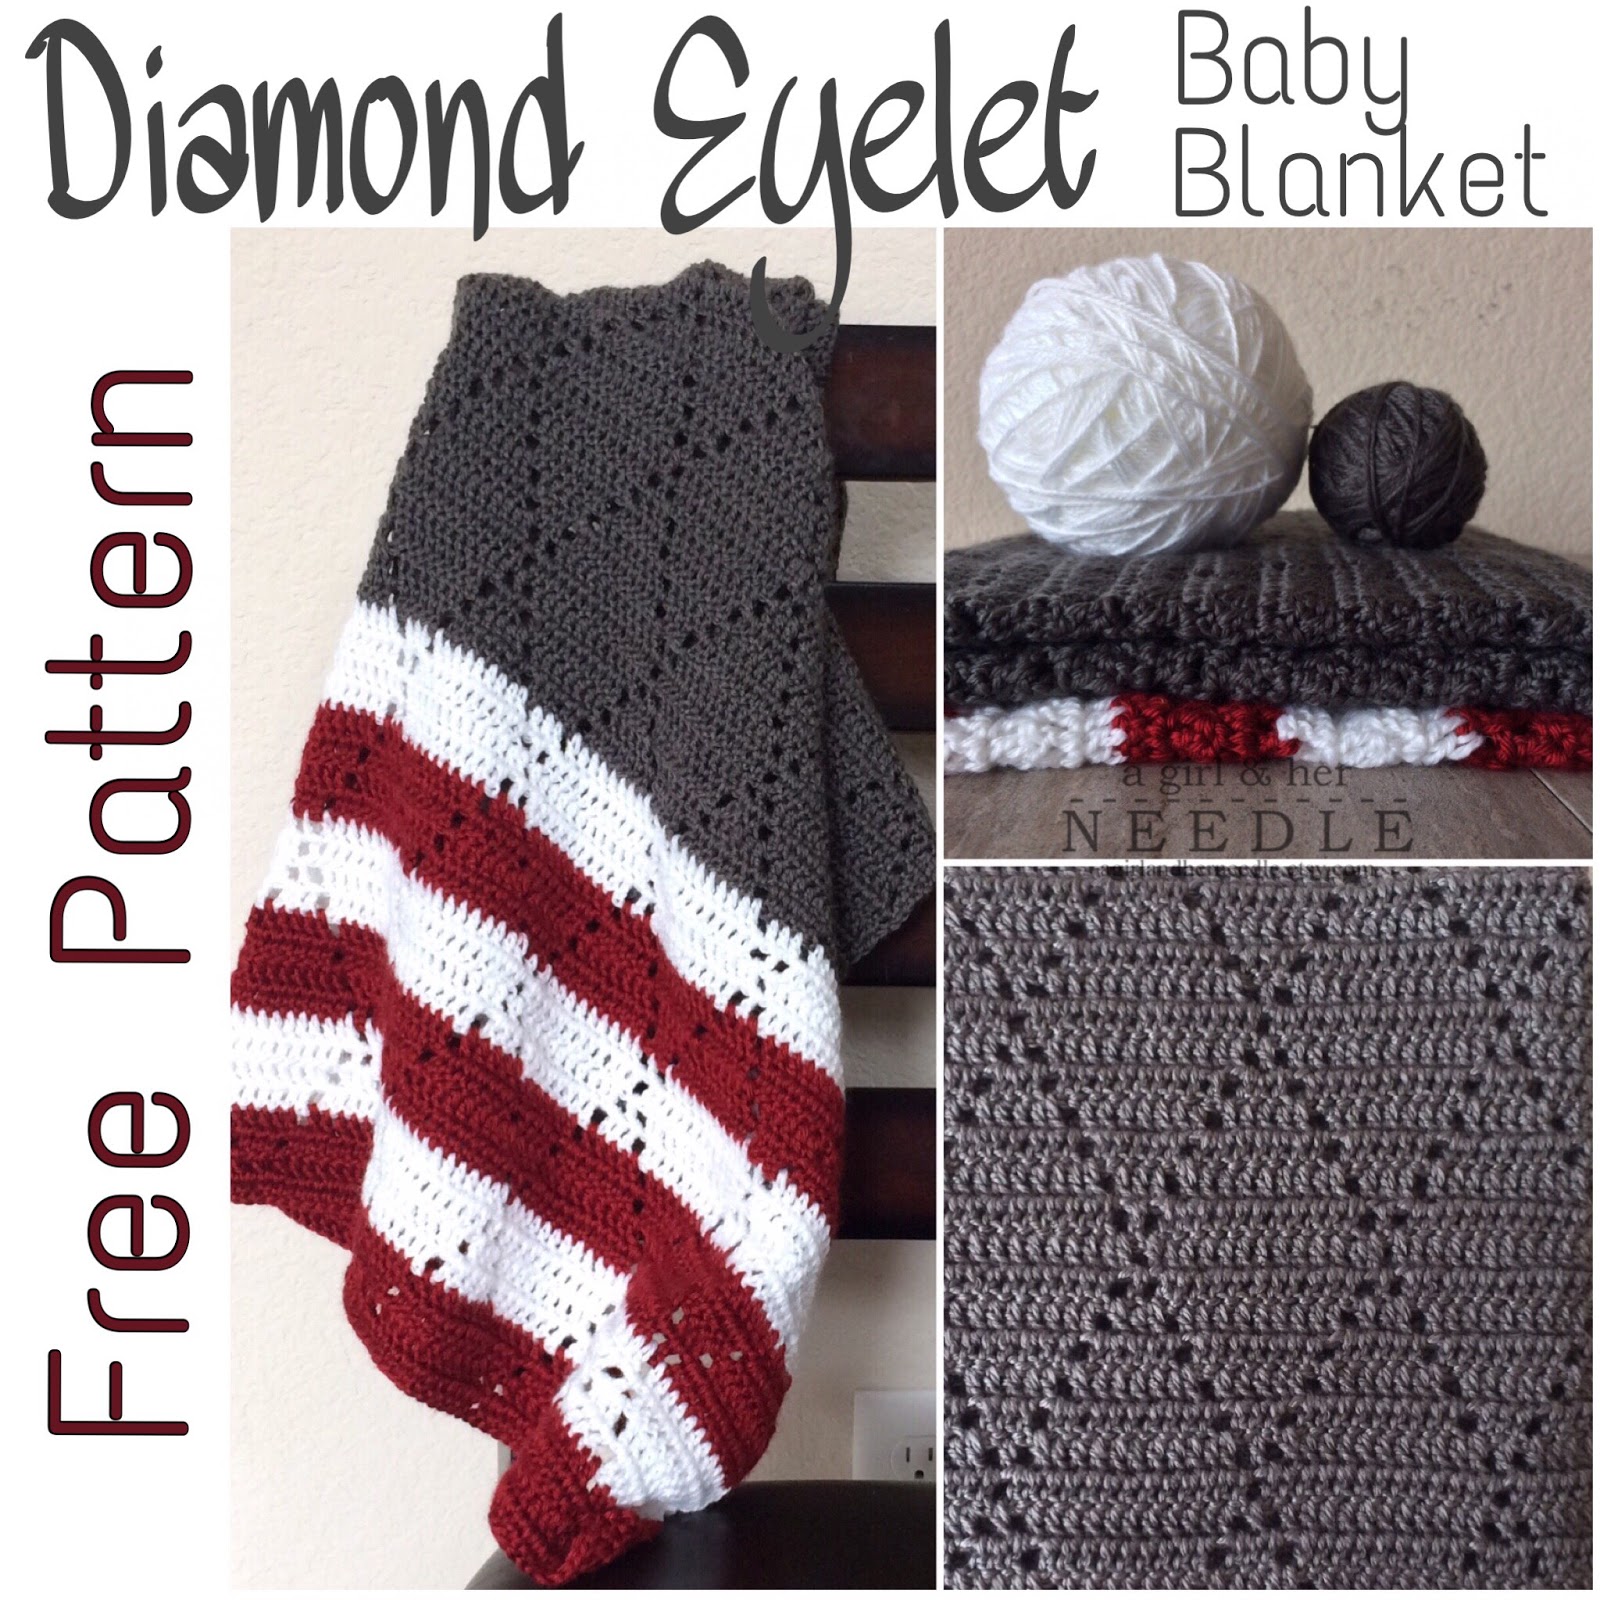
It seems this little blanket has been on my hook for the better part of a year, and I'm glad to finally have it, and the pattern finished. I'd spotted this diamond eyelet floating around the interwebs in the form of scarfs, baby dresses, table runners, you name it. 

I LOVED it. 

So I grabbed some graph paper and mapped it out. Then took a ball of gray bargain bin yarn and a plastic hook to keep me company on a three hour flight. It took a few starts and lots of frogging to get the spacing just right. Once you get started, the pattern is easy to follow and addictive to watch grow. 

Enjoy!


Diamond Eyelet Baby Blanket

Finished size: 34 x 34 inches

Yarn: Caron Simply Soft - Red
@MichaelsStores Bargain Bin Worsted-Weight - Gray, White
Hook: @boyeyarncrafts Vintage Aluminum Size G

Gauge: dc 20 for 8 rows = 4x4 inches

Chain 142
R1 - dc in third chain from hook, dc in the next 6 stitches, *chain one, skip stitch, dc in next 13 stitches repeat from * 8 more times, chain one, skip stitch, dc in next 7 stitches

R2 - chain 2, dc in next 5 stitches, *chain one, skip stitch, dc in next stitch (this is the space from the chain stitch in the previous row), chain one, skip stitch, dc in next 11 stitches, repeat from * 8 more times, chain one, skip stitch, dc in next stitch, chain one, dc in next 6 stitches

R3 - chain 2, dc in next 4 stitches, *chain one, skip stitch, dc in next 3 stitches, chain one, skip stitch, dc in next 9 stitches, repeat from * 8 more times, chain one, skip stitch, dc in next 3, chain one, skip stitch, dc in next 5 stitches

R4 - chain 2, dc in next 3 stitches, *chain one, skip stitch, dc in next 5 stitches, chain one, skip stitch, dc in next 7 stitches, repeat from * 8 more times, chain one, skip stitch, dc in next 5, chain one, skip stitch, dc in next 4 stitches

R5 - chain 2, dc in next 2 stitches, *chain one, skip stitch, dc in next 7 stitches, chain one, skip stitch, dc in next 5 stitches, repeat from * 8 more times, chain one, skip stitch, dc in next 7, chain one skip stitch, dc in next 3 stitches

R6 - chain 2, dc in next 1 stitch, *chain one, skip stitch, dc in next 9 stitches, chain one, skip stitch, dc in next 3 stitches, repeat from * 8 more times, chain one, skip stitch, dc in next 9 , chain one, skip stitch, dc in next 2 stitches

R7 - chain 3, skip stitch, *dc in next 11 stitches, chain one, skip stitch, dc in next 1 stitch, chain one, skip stitch, dc in next 11 stitches, repeat from * 9 more times, chain one, skip stitch, dc in next 1 stitch

R8 - chain 2, dc in next 13 stitches, *chain one, skip stitch, dc in next 13 stitches, repeat from * 7 more times, chain one, skip stitch, dc in next 14 stitches

R9 - chain 3, skip next stitch, dc in next 11 stitches, *chain one, skip stitch, dc in next 1 stitch, chain one, skip stitch, dc in next 11 stitches, repeat from * 8 more times, chain one, skip stitch, dc in next 1 stitch

R10 - chain 2, dc in next 1 stitch, *chain one, skip stitch, dc in next 9 stitches, chain one, skip stitch, dc in next 3 stitches, repeat from * 8 more times, chain one, skip stitch, dc in next 9 , chain one, skip stitch, dc in next 2 stitches

R11 - chain 2, dc in next 2 stitches, *chain one, skip stitch, dc in next 7 stitches, chain one, skip stitch, dc in next 5 stitches, repeat from * 8 more times, chain one, skip stitch, dc in next 7, chain one skip stitch, dc in next 3 stitches

R12 - chain 2, dc in next 3 stitches, *chain one, skip stitch, dc in next 5 stitches, chain one, skip stitch, dc in next 7 stitches, repeat from * 8 more times, chain one, skip stitch, dc in next 5, chain one, skip stitch, dc in next 4 stitches

R13 - chain 2, dc in next 4 stitches, *chain one, skip stitch, dc in next 3 stitches, chain one, skip stitch, dc in next 9 stitches, repeat from * 8 more times, chain one, skip stitch, dc in next 3, chain one, skip stitch, dc in next 5 stitches

R14 - chain 2, dc in next 5 stitches, *chain one, skip stitch, dc in next stitch, chain one, skip stitch, dc in next 11 stitches, repeat from * 8 more times, chain one, skip stitch, dc in next stitch, chain one, dc in next 6 stitches

R15 - chain 2, dc in the next 6 stitches, *chain one, skip stitch, dc in next 13 stitches repeat from * 8 more times, chain one, skip stitch, dc in next 7 stitches

R16-71 - repeat ties 2-15 in order until you reach your desired length. 


To match my stripes: 
R1-47 Gray
R48-71 alternate Red/White, 4 rows each


Monday, May 14, 2012

The New Home Ec


Heather over at The New Home Ec has a great post "24 Awesome Ways to Reuse Baby Wipes Containers."  She's included my Chalkboard Painted Baby Wipes in her list! 

Check it out!


Tuesday, March 13, 2012

Soften Scratchy Yarn

I love yarn.

I have a HUGE stash that keeps growing.

Did I mention that I love yarn?

But, lets face it, the most durable, most economic, and most forgiving yarn isn't usually the softest, or nicest yarn. I love acrylics because they're durable. They make great baby blankets. And, we all know that with babies comes laundry. Blankets (or anything for that matter) made with acrylic hold up well when washed and dried.

I noticed something after washing an acrylic crochet blanket. It softened up. A lot. It was so nice.

This gave me an idea. What if I washed the yarn before I crocheted with it?!

So, I tried it. What do you know, it worked!


Pin It


It's a simple as that!

I now toss all my scratchy acrylic yarn in a lingerie bag every time I'm using it for a project.

Try it...I promise you won't be disappointed.


Wednesday, February 29, 2012

Perfect Little Pom-Poms

Happy Leap Year!

Well, that and International Pom-Pom Day. It only happens once every four years!

It just so happens that I've been busy creating pom-poms to go with the {yo-yo's} I made.

So, to celebrate, I figured I'd share how I make tiny little Pom-Poms:
Pin It

And....

If you're looking for a fun project to make with your new Pom-Poms,
try these little guys {Fuzzy Pom-Pom People}.

Tuesday, February 21, 2012

Chalkboard Storage Tubs from Upcycled Wipes

We go though a TON of Pampers wipes around here.

I try to make a valiant effort to conserve and buy wipe refills, but inevitably the tubs come up missing and we end up buying a replacement tub.


Pin It

The kiddo's love to store their valuables in these tubs. Recently they've accumulated quite a few.

Can I tell you how frustrating it is to open (what you think is) a box of wipes (mid-diaper change) only to discover it's full of cars, or puzzle pieces, or bells?

I needed a way to visually separate their storage tubs from the actual wipes.

Here was my solution:Pin It

The kids LOVE scribbling on them. And, I haven't mistaken a tub of crayons for wipes since!

Monday, January 23, 2012

Make a Fluffy Tulle Boa

My nearly 2-year-old loves to dress up. Although she loves the feather boa's at the craft store, I just can't bring myself to buy one. I dread the thought of finding hot pink feathers crammed in the couch, when I change a diaper, stuck to little hands, in her brother's pockets - you know, the usual places kids leave stuff.

While staring at my stash, I realized I have a ridiculous amount of tulle. How cute would a tulle boa be wrapped around the chubby shoulders of my little Sophie Girl?!

Pin It
I would love to get a picture of her wearing it. Alas, every picture of her is blurry. She's a mover and a shaker. No time for pictures!


Follow Me on Pinterest

Tuesday, January 3, 2012

A Tuffet for My Little Miss Muffet


I had never truly appreciated the glory of Ikea until I married.

My mother-in-law is
Swedish.

When we visit Ikea, the Hubby jokes that we're taking a trip to the "Mother Land." He obviously doesn't appreciate the value of having an Ikea nearby like his mother and I do.


On our last visit, while my kids were aiding in the destruction of the toy play area (along with about 17 other kids), this chunky stool caught my eye. It looked like the perfect base for a little tuffet. Sturdy, so it wouldn't topple and plastic, so no painting or splinters. Both good qualities in a toy for my Munchkins, since I'm sure this stool will see a lot of abuse over it's lifetime.

Pin It

I started out making a GIANT yoyo from my fabric. Yoyo's are super simple to make. If you need a good tutorial go here.

I didn't want a really round pillow. I wanted one with a slightly squared look. To achieve this, I cut my fabric into a 45 inch square. As I stitched around the edges, I folded the corner tips in to "round" the edges a bit.

I used #10 yarn (which is like small string) mostly because it's what I had on hand. I wanted something strong to hold up to the tension of the gathered yoyo and tufted button.

Once you've stitched around the entire square of fabric, pull your stitching to create a "gather" and tighten your yoyo. Stuff with fiberfill, pull tight, and tie off.

Flip pillow over, center button and stitch through all layers attaching your stitch to the back. If you push and shape the batting/stuffing out around the button, it makes it easier to "tuft" with fewer layers to stitch through.


Cut your ribbon in half, trim and heat seal your ends. Secure the ribbon around the bottom of the stool and tie up and around your pillow.

The stool is rather tall for my almost two-year-old. So, I didn't do anything to secure the pillow with anything more than the ribbon (I'm sure she'll be pulling the pillow off and putting it back on over and over and over again). However, if you wanted to make it more "permanent," you could stitch the ribbon to the pillow or add a strip or two of double sided Velcro to the seat and underside of the pillow.


Well, folks, there you have it...a super simple and quick makeover for a basic Ikea stool that turns into a darling Tuffet for any Miss Muffet!


Thursday, July 28, 2011

Pom Pom People - Tutorial


These puffy, rough, yellow Pom Poms were initially intended to be made into fluffy yellow chicks. But, like so many other projects, ideas change.

My little 4-year-0ld Munchkin loves to play with these Pom Poms. He's been begging me for days to help him glue "Boogly Eyes" onto them to make a "Fuzzy Monster."

This is such a fun and simple activity.

What you need:


1 big Pom Pom for the body (you can make your own or purchase bigger ones)
1 tiny Pom Pom for his nose
2 Pipe Cleaners
2 Googly Eyes (or "Boogly Eyes" as they're called around here.)
Any other embellishment you'd like to add (The Munchkin bent some leftover pipe cleaner and asked me to add the mustache.)


Bend one pipe cleaner in half. These will be your legs.
Cut the other pip cleaner in quarters. These will be your toes.


Spread the Pom Pom fuzz apart near the center. Add a dab of hot glue. This is where you'll put the center of your bent legs. Once it's glued, cover the pipe cleaner back up with the Pom Pom fuzz.


Do the same thing with the legs. Move the fuzz back and glue the legs to the center of the ball. Cover all exposed pipe cleaner w/ Pom Pom fuzz.

Bend the tips of your pipe cleaner to make a small loop.


Next, take your quartered pipe cleaner and bend the ends to the center. Wrap them around your little foot. Dab some hot glue to secure.


Gently move fuzz.
With a dab of hot glue, affix eyes, nose, and any other embellishments you'd like to add.


You're done!


Follow Me on Pinterest

Wednesday, October 27, 2010

Monster Bean Bags - Tutorial

For my dear, sweet, sister A. Have fun making these little monsters with your little munchkins!
What you'll need:
  1. 5-7 Felt Squares - Any Color (1 black & 1 white for eyes)
  2. Glue Gun/Glue Sticks
  3. Cheap Bag of Beans
  4. Zipper Sandwich Baggies
  5. Scraps of Yarn (not pictured)

Getting Started: Cutting
Body: For each Monster fold one felt square in half. Cut about 3 inches off the edge. You will be left with a 6 inch square (folded).


Eyes: For each Monster cut two large white rounds, two medium colored rounds, and two small black rounds.

Mouth: Use your imagination! For each Monster cut black backing in a strip or round, lips in a slightly smaller strip or round, and jagged teeth.

Spots: Here is where a 3-Year-Old comes in handy. Have your Munchkin(s) practice their scissor skills. They are great at cutting odd shaped spots - and teeth!

At this point - layer Eyes, Mouth and Teeth to get an idea of how your Monster will look!

Assembly: Gluing

Beans/Body: Scoop about 2/3 cup of dry beans into a zipper sandwich bag. Press out extra air and fold over excess plastic. Unfold square. Place beans in center. About one inch from edge place a line of hot glue. Fold and press two halves together.


Mouth: Take the mouth pieces you layered earlier and glue them to the body starting with the bottom (black) piece. Glue teeth in place last.


Eyes: Take the eye pieces you layered earlier and glue them to the body starting with the bottom (white) piece. Glue pupil in place last.


Spots: Take the spots you had your little Munchkin cut out. Glue them randomly to the body - both front and back.


Finish: Edging/Fringe and Horns
Fringe Edge: Cut strips about 1/2 inch deep (to glue line). Fringe strips can be exact width, or varying widths.


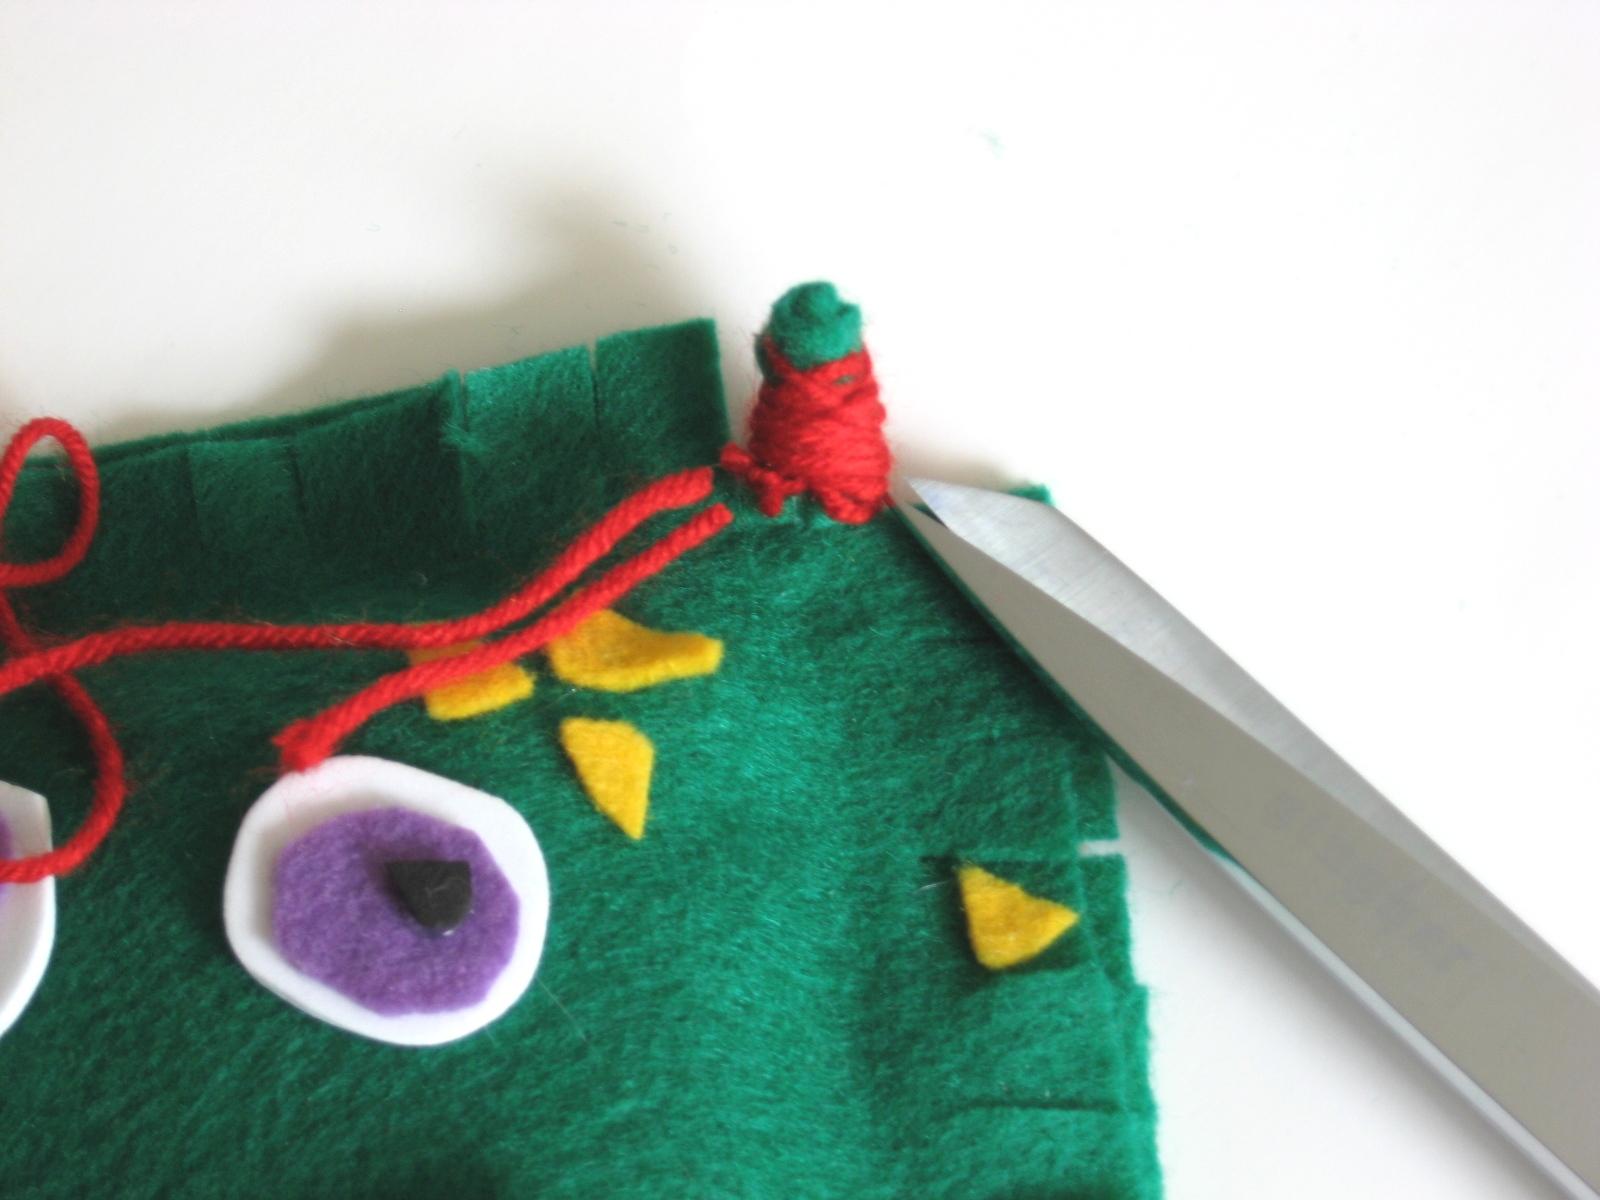
Horns: Fold fringe in corners, tie scrap yarn leaving an end long enough to tie a knot. Wrap yarn several times. Tie off and trim edges (see pic below).


***For a variation on the fringe/horns - cut along fold of the body, glue all four sides, cut fringe on all four sides, and wrap horns in each corner. (See red Monster Bag for reference).

Pull off all excess hot glue strings and you're DONE!

Enjoy your new Monster Bean Bags!